Breathing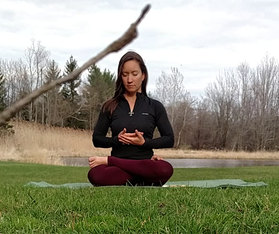 When I began to practice yoga, I loved the challenge of the poses. When I went through yoga instructor training, I was blown away by the value of deep breathing. Deep breathing can be so beneficial because, when practiced correctly, it can support the parasympathetic nervous system and activate what is commonly known as the "relaxation response," reducing stress and its effects on your body and mind. countingandThe easiest way to be more fully aware of how shallow and short your unconscious breath is - it to count it. When I am breathing naturally - without thinking - I breath in for about 2-3 seconds and out for 2-3 seconds. If I'm in crisis, it's closer to 1-2 seconds for each inhale and exhale. In order to deepen your breath, count to 4 on each inhale and exhale. Try counting to 5, or 6, or 7, or 8. An 8 count breath is at the high end of what I'm comfortable with. And of course, it's rather subjective as I may count slowly at times and quicker at other times. The purpose of the exercise is to simply take deeper, slower, and more even breaths. Breath Verses Counting over and over can be soothing - or it can be tedious (and my mind begins to wander, honestly). So rather than just counting - I have learned to use Scripture Verses to breath to. I find a short 2-4 line phrase from my Bible and inhale for half of it and exhale for the other half. It's tenfold more powerful as now I'm transforming my body, my mind AND my spirit. Now I can break cyclical thoughts, destructive thoughts, lies in my head, anxiety, depression, etc - by repeating scripture over and over as I take deep breaths. Not only is it incredible throughout my yoga practice, but it's also incredible off my mat and during my day when I need calming (and with four children - that's often). The great thing about finding scripture verses to breathe to and repeating them over and over and over is that you memorize scripture easily. My Favorite Breath VerseMy favorite verse, my go-to verse, is one that applies to almost all circumstances and guides a morning yoga class to set me (and all my yogis) up for a great day. Psalm 118:24 - This is the day the Lord has made; We will rejoice and be glad in it. I inhale during the first line - nice and slow. I exhale slowly during the second line and personalize it by saying that "I will rejoice and be glad in it." This verse is so powerful because it reminds me that this day was created long before I ever stepped into it - that God has arranged my day and knows what I am going through before I ever go through it. It also reminds me that it is a CHOICE to rejoice and be glad. I can choose to dwell on unnecessary thoughts that do more harm than good, or I can choose to rejoice (to sing, to praise, to count my blessings) and be glad. If I start the day this way - I have a wonderfully pleasant day. I did a thingI think this is so powerful in my own life and those who come to my classes tell me that it is impactful in their lives as well. I love talking about Breath Verses and sharing it with everyone I can, so I decided to design a shirt to promote it and share with others! It's a beginning point - I'm not making any money off of these shirts, in fact I purchased one as well. If you like the shirt but have other feedback or would like a different shirt - I'd love feedback! :) I'm placing this order in a week - so if you are interested, purchase it soon! If you live farther away and would like one shipped to you - I'll work on that next. 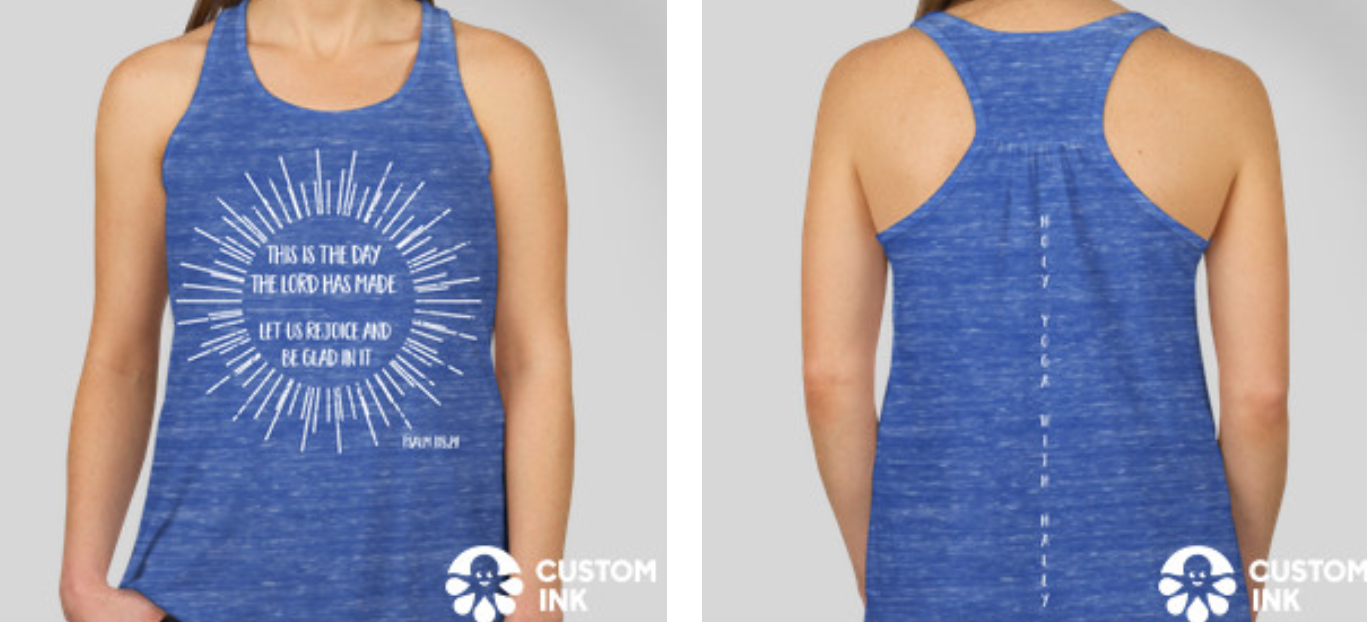
4 Comments
We just got a new puppy. That may sound exciting to most, but I don't really like puppies. I know that sounds absurd, but they require so much attention, care, and training - something that I know I won't enjoy adding into my day. We said goodbye our gorgeous White Lab, Jaxx, last fall and currently have this gorgeous mutt named Ylarra. Ylarra was slightly aggressive and territorial until Jaxx passed and her personality changed significantly. She became sweeter and her aggression disappeared, yet she became more anxious. A few months ago we began to think that adding another dog to our home for her (and for everyone else, if I'm being honest) would be helpful.  Jaxx, our White Lab, was remarkably calm, affectionate and loyal. He needed very little and spoiled me as a dog owner. I really wanted a low key dog that needed very little but I knew that was going to be hard to find. I also wanted an older dog that was already housebroken and somewhat trained. I also loved that my current mutt was an intermediate size - not too big and not too small. Lastly, I wanted to rescue a dog that needed a home. My husband wanted a large breed puppy he could train from the beginning and I found myself feeling stressed out just thinking about the differences in our desires. I began to pray. I needed to talk to my best friend about my wishes, my requests, my hopes and dreams. I needed to let go of what I wanted and allow Him to bring a dog into my life of His design. This past weekend we were introduced to this gorgeous Anatolian Shepard puppy that had a paw with crooked toes. We brought her home yesterday and today I sat in tears this morning as I read my morning devotional. "Trust in the Lord with all your heart, and lean not onto your own understanding. In all your ways acknowledge Him, and He will direct your paths." - Proverbs 3:5-6 This morning I woke up with a 15 year old dog inside the body of a puppy. She is content to sleep most of the time, lay around, is just slightly curious, and made it through the whole night without an accident. God provided what my husband desired and what I desired at the same time. I trusted my Savior. I leaned on him when I couldn't understand the future and was uncomfortable and stressed out. I acknowledged Him in our search and was willing to go where he was leading me. My God is wonderfully present in my life and I can see his fingerprints on most things, but this puppy is the manifestation of my prayers. One I couldn't see coming. She is a reminder of how good my God is, how faithful he is, and how he answers prayers.  
Vitamix is known for incredible quality and a high price. I'll be the millionth voice to tell you that it is worth every penny. As a Raw Vegan Chef and Educator, I've been using a reconditioned Vitamix 5200 for 9 years now, multiple times every day. I love it and it has never let me down; without it I wouldn't be able to make most of the food I depend on. I just got the Vitamix E310 and couldn't wait to try it out!
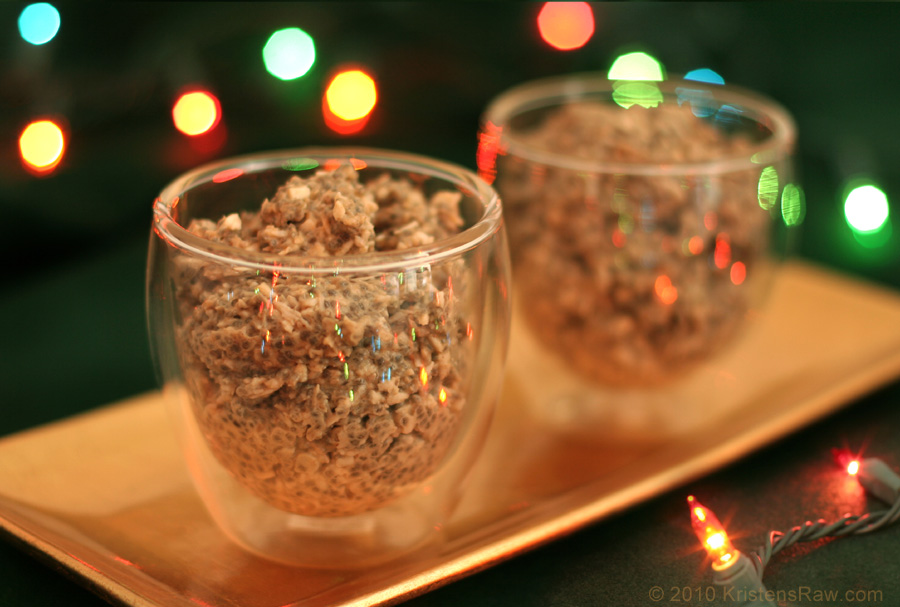
One thing that I make on a daily basis, thanks to the Vitamix, is Raw Vegan Ice Kream. My kids get to enjoy Ice Kream as their fruit and vegetable for at least one meal a day. During the summer....it's for breakfast! During the school year, it's the first part of dinner! My usual Vitamix has a 64 oz container, which is ideal, but I've always struggled to make Ice Kream for just one person - not enough ingredients to blend. This new Vitamix has a short container and can fit under my counters nicely, but now I get to try making Ice Kream for just one person - me! Watch the video below to see how it went!
I posted a picture of my lunch a week ago and there was quite a few requests for the recipe. You can find this recipe and a lot of other delicious wraps in my UnCookBook #5 (and of course the Complete UnCookBook). I love this wrap because I can eat all of the colors of the rainbow (each color has different nutrition and antioxidants) and get a wide variety of nutrition. AND, it's visually appealing! The sauce is the best part of the wrap (and for most of my dishes) - this spicy ranch sauce is a great condiment and dip as well. I love using Collard leaves as the wrapper as they are ridiculously beneficial for your health, sturdy so as not to fall apart after the first bite, and a nice round shape (similar to a tortilla). If you want to use lettuce or *gasp* a whole wheat tortilla...Yay! You are eating more veggies! 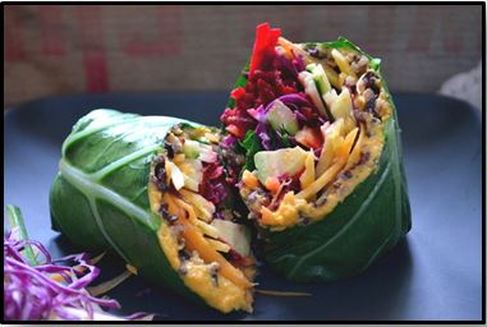 Rainbow Ranch Wrap Appliances: Blender Prep Time: 10 minutes Ingredients
In the middle of each collard leaf, layer the carrots, cabbage, pepper, kale, and avocado. Drizzle the Spicy Ranch Dressing on top of the pile of vegetables. Roll the collard leaf like you would a tortilla. Cut in half and serve with a smile! Spicy Ranch Dressing Appliances: Blender Prep Time: 5 minutes Ingredients
Blend all ingredients till smooth, but add the water slowly (it’s easier to pour it in slowly until it’s the consistency you like than try to take out if you add too much). Makes 1 cup of sauce and lasts a week in the refrigerator. Use as a dip, a spread, or a sauce! If you make this wrap - please take a photo and share it with me by email, facebook, or instagram! 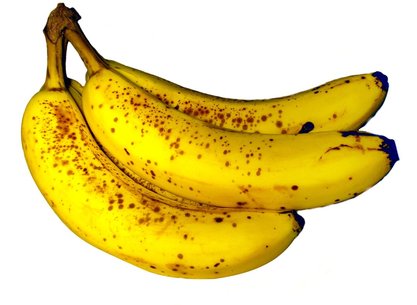 I love fruit. I believe fruit to be the only thing on earth specifically designed for us to eat. The ripening process encourages us (and all animals) to eat fruit - it becomes more aromatic, softer and easier to chew, and the color becomes more vivid to catch our eyes. I could talk about fruit for a long time. But today, I want to talk about BANANAS!
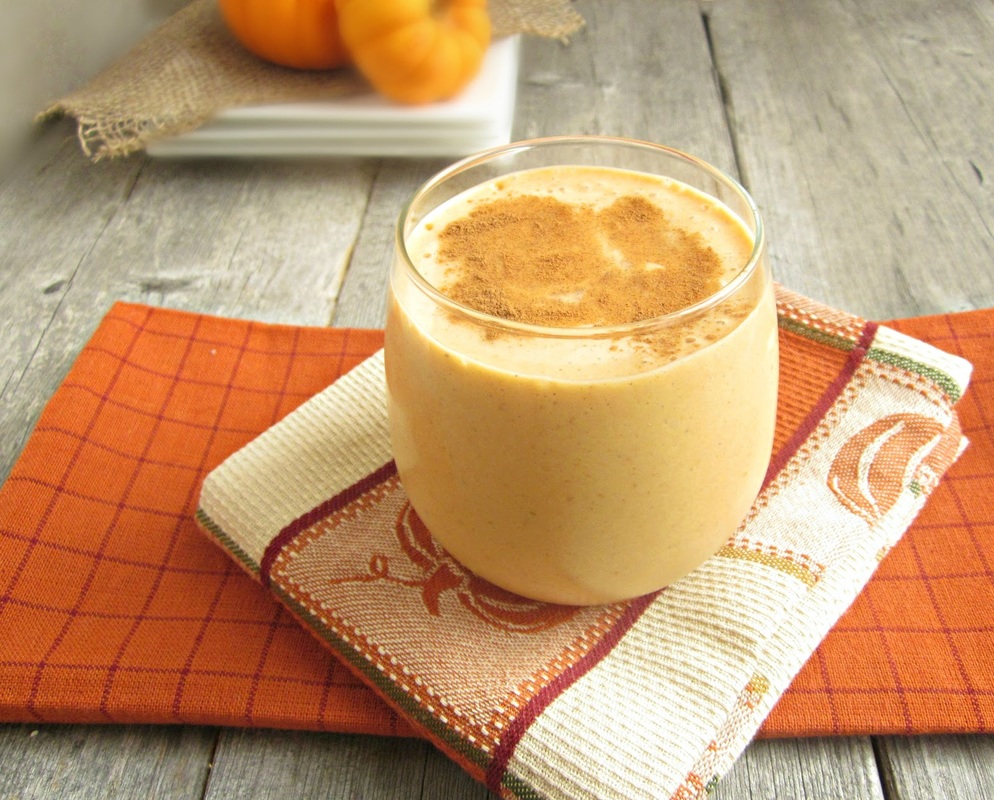
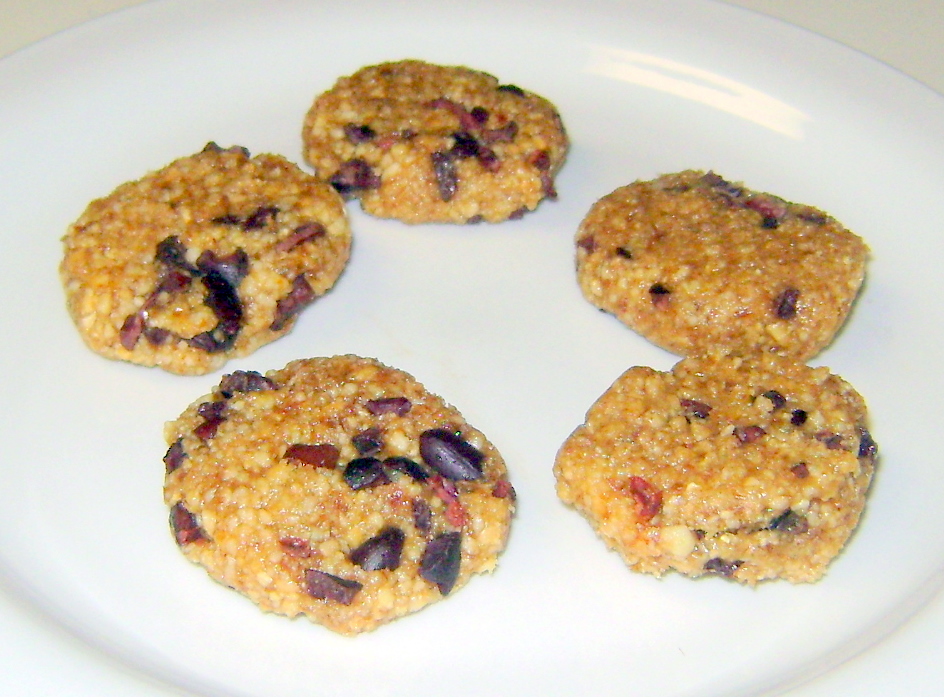
Let's talk about why I think bananas are so amazing. 1. The average banana contains three grams of fiber which will help you feel full and keep cravings at bay. Chicago’s Smell and Taste Treatment and Research Foundation found you don’t even need to eat one to get the effect. Just smell a banana when you’re hungry and you can fool your brain into thinking you’ve already eaten one. 2. Bananas release energy slowly, so they help the brain stay alert for longer. The high potassium levels also energize the brain, which makes us more alert and receptive to learning, while the magnesium improves focus. I find that if I'm starting to wilt halfway throughout my day, if I eat a banana (or drink a green smoothie), my energy increases and my focus strengthens. 3. Jamaican Olympic sprinter Yohan Blake reportedly eats 16 bananas a day. Many professional athletes have been witnessed eating bananas shortly after their events. So why do so many athletes reach for this fruit? It seems they know bananas give you energy, just the right way. Every banana contains three different kinds of sugar. Glucose and fructose are quickly absorbed into the bloodstream, so they’ll give you an energy boost fast. Sucrose acts more slowly, so it keeps your blood sugar level stable and ensures you don’t suffer the crash that comes with other sweet treats. Studies back up the science too. The Appalachian State University Human Performance Lab recently found that eating half a banana every 15 minutes during a cycling time trial test aided performance just as much as drinking a sports energy drink at the same intervals. 4. Almost 40 percent of Americans struggle with the symptoms of heartburn at least once a month. Instead of reaching for an antacid, a banana is a chemical-free solution to this common complaint. The extra mucus that prevents and heals peptic ulcers will also protect your stomach from too much acid. The high potassium level in a ripe banana will also reduce the stomach’s natural acidity. Its fiber then speeds up digestion, which reduces the amount of acid the stomach needs to produce. 5. If your blood pressure’s on the high side, make sure bananas are in your shopping cart. A local study found that eating five bananas daily was half as effective as taking prescription medication for hypertension. This research was supported by an Indian study which found eating just two bananas a day reduces blood pressure by 10 percent in as little as a week. Bananas are low in sodium and high in potassium, so they’re perfect for 67 million Americans suffering the condition. 6. Bananas contain tryptophan, a substance which the body converts into the feel-good hormone serotonin. You recognize this substance because of the sleepy feeling you get from turkey on Thanksgiving. The National Association of Mental Health discovered people with depression felt better after eating a banana. With chemical antidepressants taking six to eight weeks to kick in, perhaps sufferers would be better off reaching for a quick banana now and then. Have you had a banana today? Go buy some! Enjoy a green smoothie with bananas in them! :) I'm making these again tonight for my husband with a few simple tweaks that he would prefer, but the base recipe stays the same. As always, my recipes are Raw Vegan because I AM raw vegan. They do not need to stay that way. If you'd like to throw these on a baking tray to warm them up and make them a little squishy before adding the cheeze, go for it! If you would like to take the stuffing and use it as a salad dressing - yay! Make my recipe YOUR recipe and then let me know what you thought! Leave your comments below! 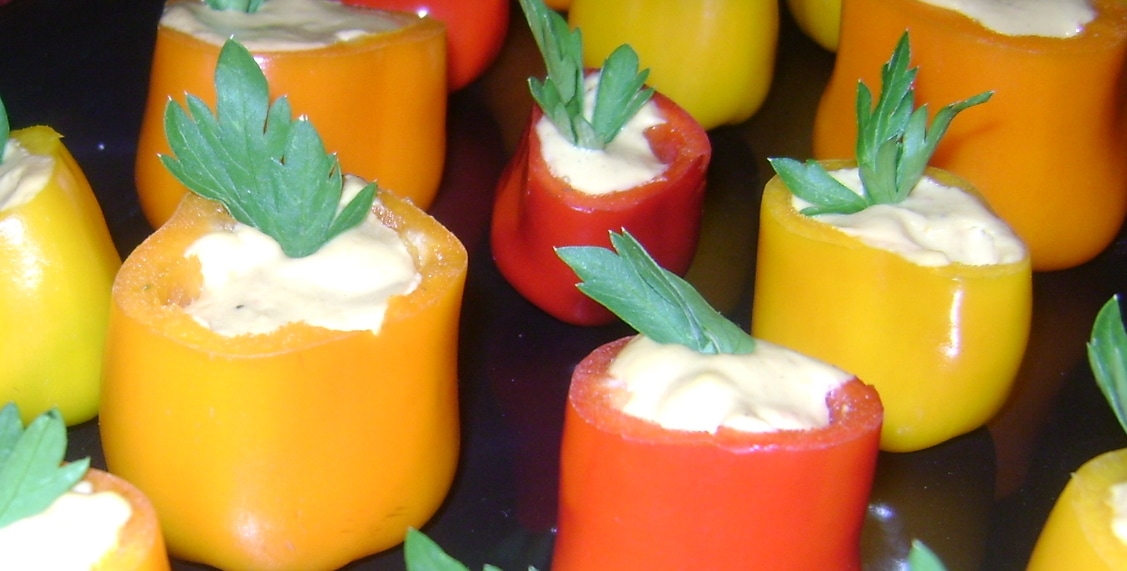 Jalapeño Cheeze Stuffed Mini Peppers
Appliances: Blender Prep Time: 5 minutes Ingredients
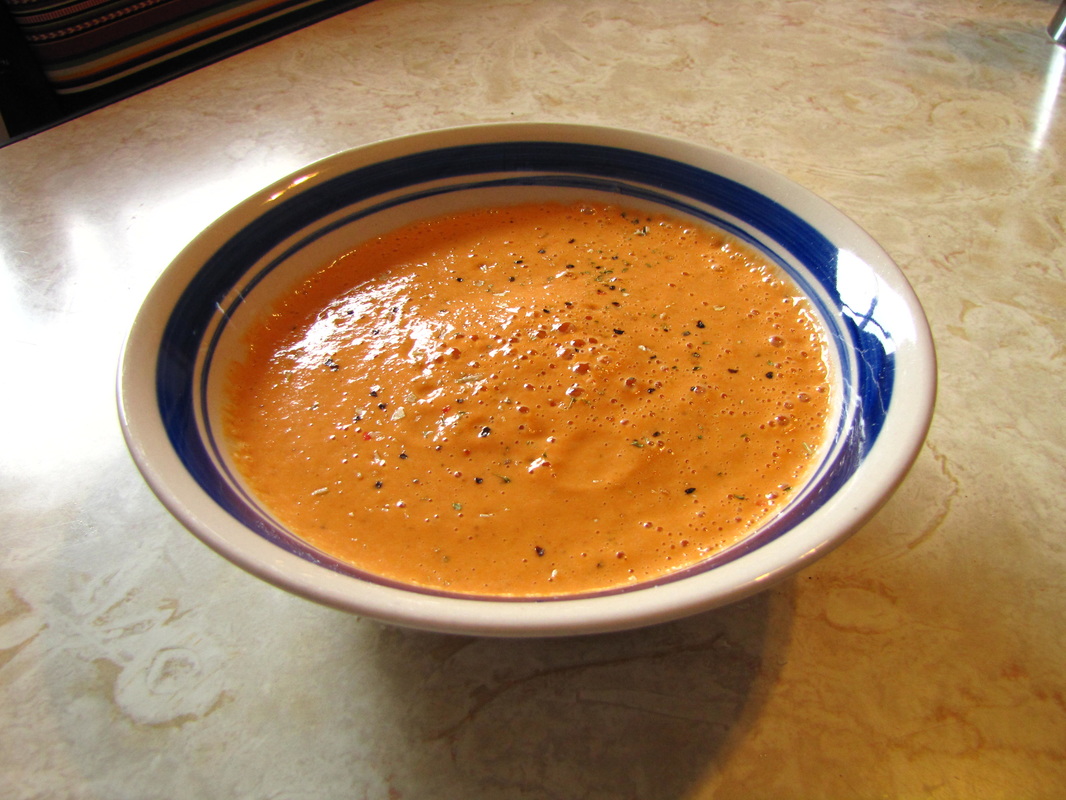
Blend all ingredients, except peppers, untill smooth, but add the water slowly (it’s easier to pour it in slowly until it’s the consistency you like than try to take out if you add too much). Cut the stems off each bell pepper and scrap out any seeds within. Spoon (or pipe, like you would frosting) the cheeze sauce into the bell peppers. Serve and enjoy! If you loved this recipe, it can be found in UnCookBook #4 or the COMPLETE UnCookBook. If you are interested in any other recipes, you can find a full list here: http://www.livingrawbygrace.com/lists-of-recipes.html 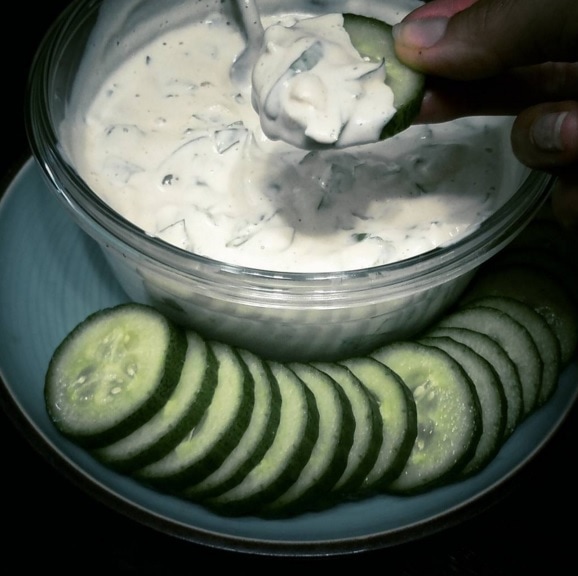 Everyone was so very excited and interested in this dip, that I thought I would share it with all of you! Read all the way to the bottom to learn tips and tricks to make it the best dip ever! Creamy Spinach Dip Appliances: Blender Prep Time: 5 minutes Ingredients
TIPS AND TRICKS1. Use a Vitamix to get the smoothest texture possible. Don't have a Vitamix? Soak your cashews for 4-6 hours (or overnight) before using them in this recipe. That will help your blender with consistency.
2. Make sure those are RAW cashews - roasted cashews will change the consistency and the flavor, and not for the better. 3. Aren't in love with onion? Try a yellow or white onion instead of a red onion. Can't cut it without crying? Find a good slapchop. It's great for small quantities and it keeps me from crying! 4. Do you know that garlic is a little cold pill? This bad boy is anti-fungal, anti-bacterial, and anti-viral? It kills and promotes immunity for all sorts of colds/flus/infections. The more raw garlic you have in your diet, the less likely to catch the next thing going around. So this dip - I should have called it the Cold Buster. Wait, that's just how I make it - with 1-2 more cloves. ;)
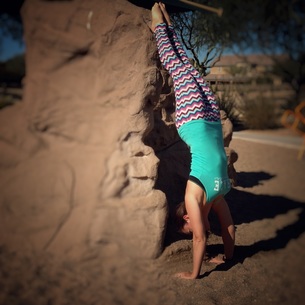
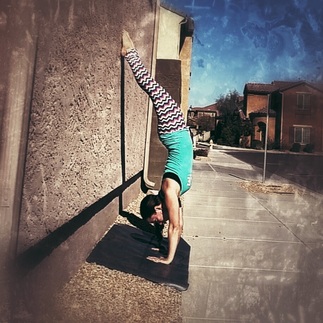
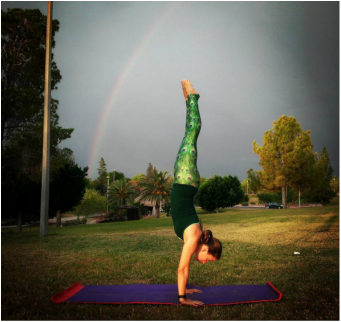
I apologize for the lateness of this post. It's been a crazy week. That is where grace comes in. :) Hopefully you all have been working on the exercises that you have been given so far this month. Today we kickup into a handstand near a wall. We use the wall for balance, support, stability, and security. We use our muscle memory - all the exercises that we've been doing this month - to get us into a handstand. 1. Start in Down Dog a foot away from a wall, facing the wall. 2. Take a step forward with one leg. 3. Bend the knee of your forward leg and slowly kick one foot up to the wall. 4. Stack your shoulders over your wrists. 5. Attempt to stack your hips over your shoulders. 6. Now is not the time to stick your handstand, we are simply kicking up and coming back down. Great! Now let me know how it goes! And let me know how many times you fell down - everyone does! Welcome to the 3rd week of this challenge! Today we start working specifically on Handstands! Yay! Today we are doing kickups. The first thing I must specify is to practice this on a fairly soft surface (yoga mat, carpet, grass, etc.) and EXPECT to fall over. When it comes to learning how to handstand, you need to be not only okay with falling over, crashing down, but you need to prepare for it. The more comfortable you are with failing, the faster you will improve. If you are hesitant, cautious, concerned, worried - that will only impede growth. We all fall - no one is immune.
Today is very similar to Days 1 & 2, but I want you to do as many Yogi Pushups as possible at a time. Yogi Pushups are slightly different than other pushups as you keep your elbows tucked into your body. Because of this, you use your entire body in this exercise, not just your upper body. When done correctly, your entire core is working, as are your hips and legs. The majority of the work is left to your chest and arms, but so completely necessary for handstanding! Not to mention other amazing benefits:
OPTION #1
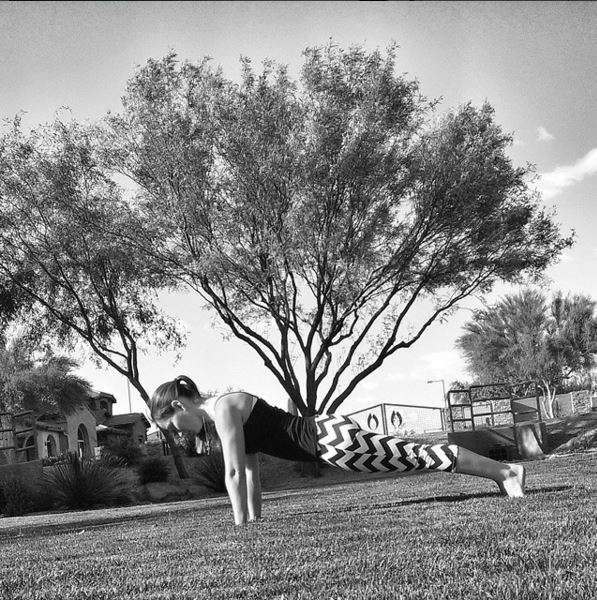
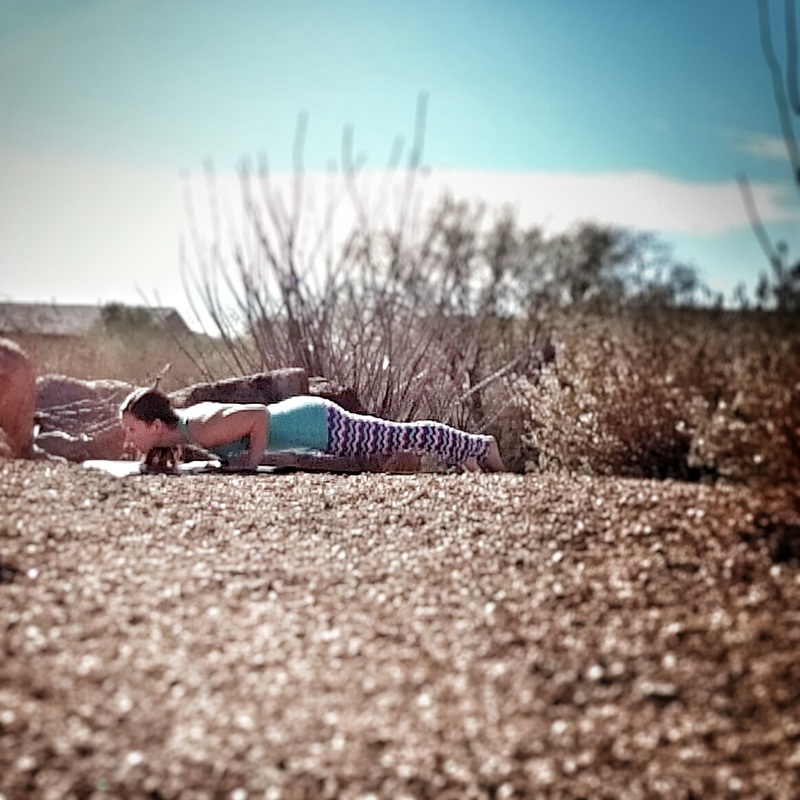
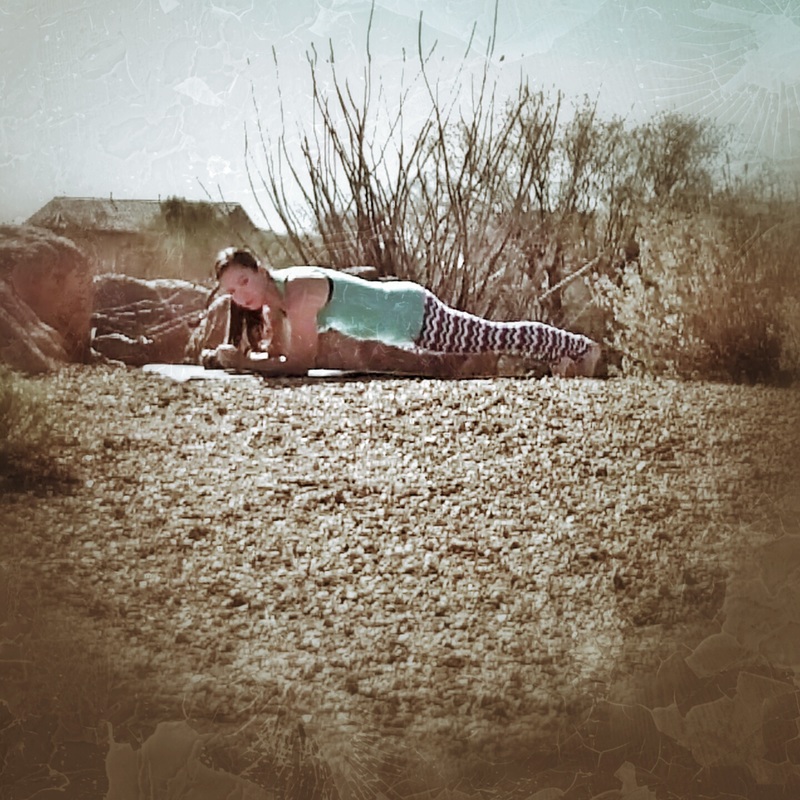
1. Begin in High Plank Pose (see Day 1's directives). 2. Keeping the entire body engaged, roll the body forward to the tiptoes. 3. Hinge at the elbows and begin to bring your body down toward the mat. 4. Pause for a slow and controlled breath (6 count breath) in this low position. 5. Real press through the heels of the hands and come back up (without dipping your back). 6. Come out of the pose to your hands and knees. 7. Repeat as many times as you can in one sitting. OPTION #2 1. Begin in Plank Pose (see Day 1's directives). 2. Lower down onto your forearms, keeping the plank position - belly button pulled up toward your spine, shoulder blades drawn together across your back, back straight and gaze forward. 3. Hands can be pressing into the ground or balled into fists, make sure your elbows are directly beneath your shoulders. 4. Pause for a slow and controlled breath (6 count breath) in this low position. 5. One hand at a time, keeping the plank position, slowly come back onto your hand in high plank position 6. Come out of the pose to your hands and knees. 7. Repeat as many times as you can in one sitting. As always, take time to do this exercise three times today. Breathe into your holds. I love to see your photos and to hear how it goes!
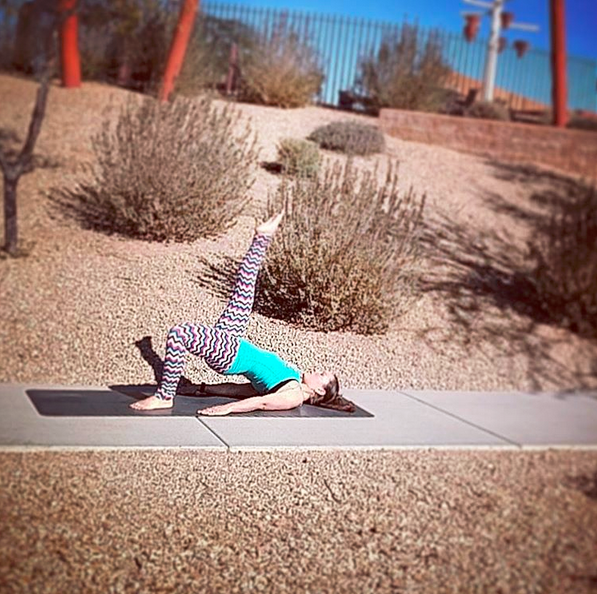
BRIDGE LEGS 1. Begin in Bridge Pose - see day 9. 2. While pressing up into bridge, inhale and with your exhale slowly lift your left leg high into the air, keeping it straight. Press through the heel of your right foot into your mat. 3. Hold here and breathe deeply. Shaking and trembling are wonderful! 4. Slowly lower your left foot back to the mat. 5. You may bring your hips back down to the mat and relax and breathe. 6. Press back into bridge and lift the other leg. (You can stay in bridge and then do the other leg if you don't feel you need to rest). TIPS: Pull your shoulders away from your ears before you press up into breathe and then actively draw your shoulders blades together across your back while in bridge pose. Your leg doesn't need to get as high as mine, find your own version of Bridge Legs that work for you. ☺ This is also a great resource with lots of good tips if you would like to continue reading. 💙 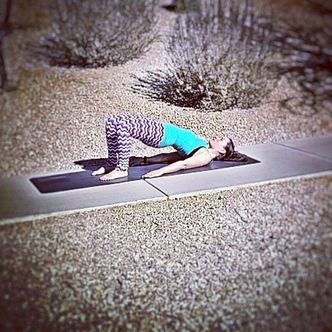 Bridge Pose is commonly used to stretch and strengthen the back and abdominal muscles as well as open the lungs and chest. Yoga poses that focus on the lower back such as the Bridge Pose have been shown to alleviate back pain. The more you practice Bridge Pose, the stronger your back and abdominal muscles, which similar to the last few days, we are training to maintain balance while inverted in a handstand. 1. Begin by lying on your back. Bend your knees so that the soles of the feet are flat on the floor.
2. Bring the heels about 3-5 inches from your tailbone and spread your toes wide. Place your hands near your hips with your palms on the mat. 3. Inhale deeply. With your exhale, lift your hips toward the sky, pressing your heels into the mat. 4. Continue pressing your hips high for 3-4 breaths, then gently release your hips down to the mat, rolling down one vertebrae at a time. 5. Come out of the pose by drawing your knees into your chest for 1-2 breaths to counter stretch your back. TIPS: Really press in with the hands and the soles of the feet, as they are your foundation. Imagine a block between your thighs that you are holding there - squeeze your inner thigh together while you are pressing your hips high into the air. Pull your shoulder blades down away from your ears - you can even clasp your hands together and pull them away from your ears while your hips are high. MODIFICATION: Place a block under your tailbone and rest onto it. As always, take time to do this pose three times today. Breathe into your holds. I love to see your photos and to hear how it goes!
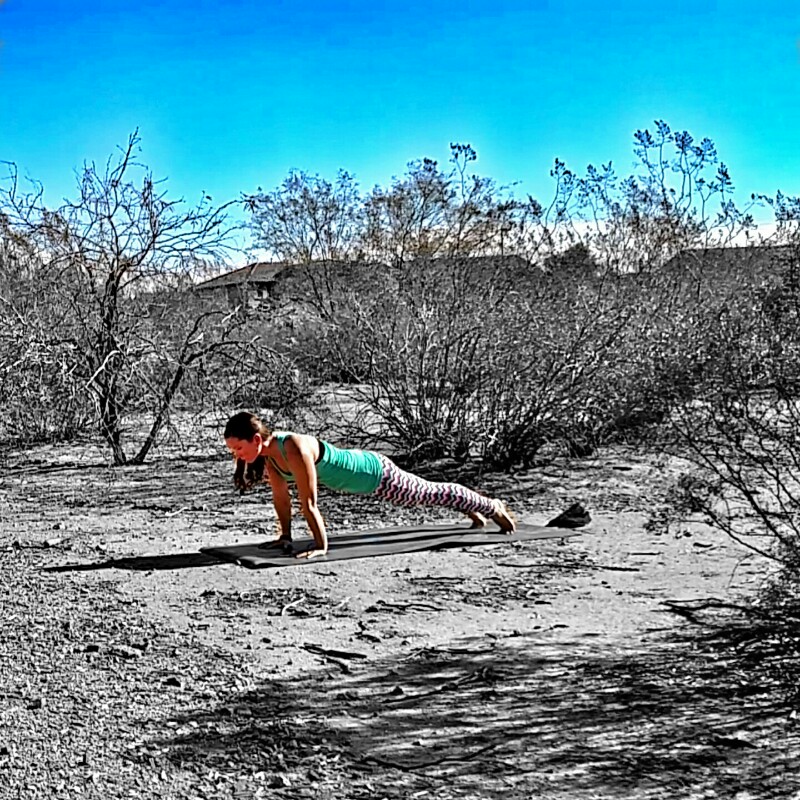
PLANK KNEES 1. Begin in High Plank Pose - see day 1 for directives. 2. Keeping your back flat, your pelvis low without dipping, and your shoulders directly over your hands, slowly lift your left foot off the mat and bring your knee to your left tricep. Take a deep inhale and with your exhale, slowly bring your foot back with your other one. 3. Inhale and slowly lift your left foot and bring your knee to your nose. Exhale and slowly bring your foot back. 4. Inhale and slowly lift your left foot and bring your knee to your RIGHT tricep. Exhale and slowly bring your foot back. 5. At this point you can take a break, set your knees down, come into Child's Pose, or continue on. 6. Come into High Plank Pose and go through the whole routine with your right knee. 7. Come out of the pose into table top and push back into Child's Pose. Take 5-10 six count breaths. Once again, I encourage you to do three sets of these today. If you can hold your knee at each tricep for more than one breath - even better. If you have NEVER done these before...take your time, give yourself grace, don't feel bad if you need to take more frequent breaks. It's all a practice...we are working toward slow and steady progress. Once again, let me know that you did these today, whether you were able to take a photo or not. :) Any questions - shoot them my way on Facebook or Instagram.
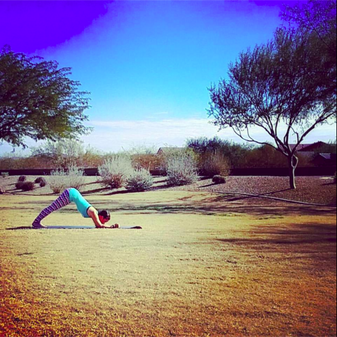
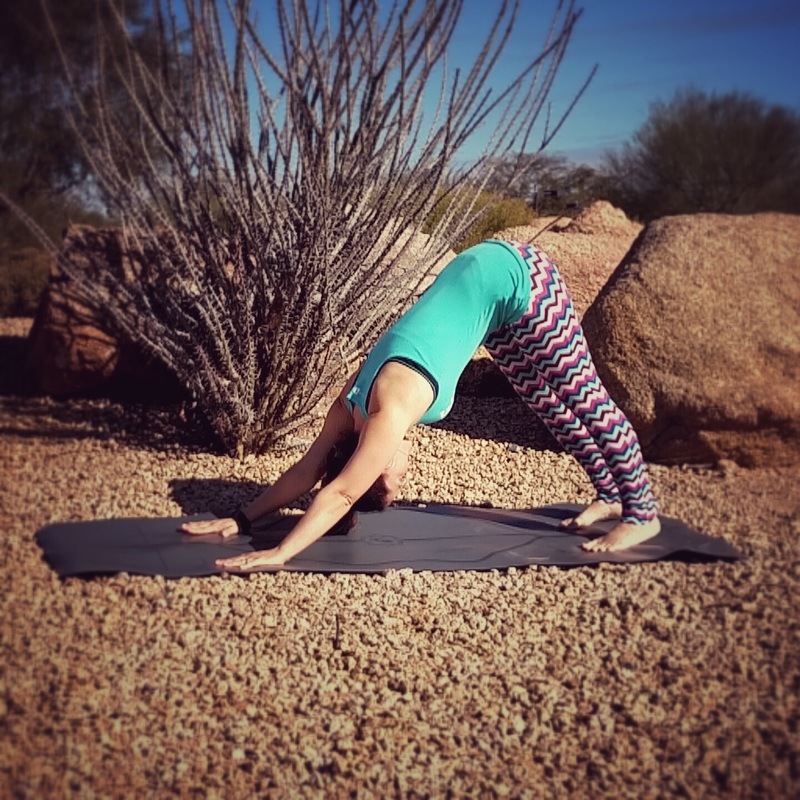
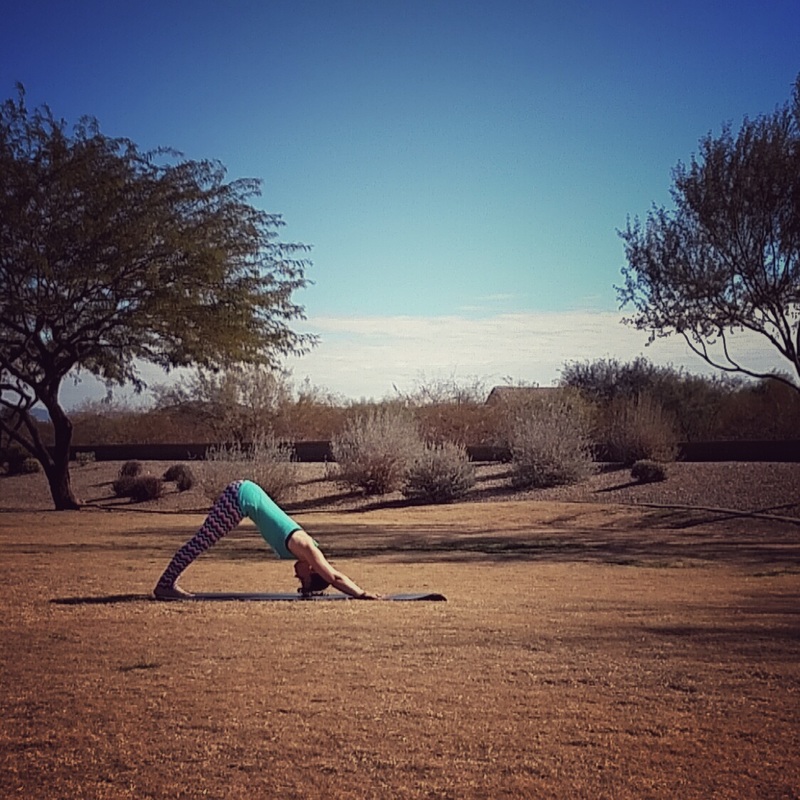
In this pose, one leg is lifted, but there is more to it than that. Let me walk you through it: 1. Begin in Downward Facing Dog Pose - see day 3. 2. Keeping your shoulders square and melted toward your thighs, inhale and slowly lift your left leg. 3. As you lift it high into the air, square your hips to the mat - keeping them parallel to the ground. Be careful not to angle your body to the side. 4. Point your toe into the air to engage your leg muscles, take a 6 count breath in and out, and slowly lower your leg back down. 5. Once more with the other leg. 6. Slowly come out of the pose into Table Top Pose (hands and knees). I will challenge you again to do this pose at least THREE times today - all spread out throughout the day, or all at once as your 10 minute yoga practice. We are building our core, shoulder, back, and arm strength and stability. We WILL get to handstands...but I want you to be far more capable when we do. I believe in you!
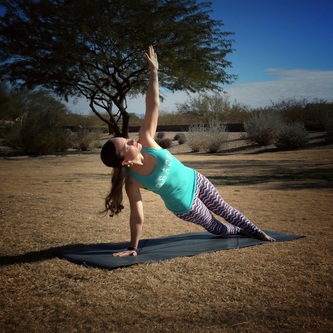
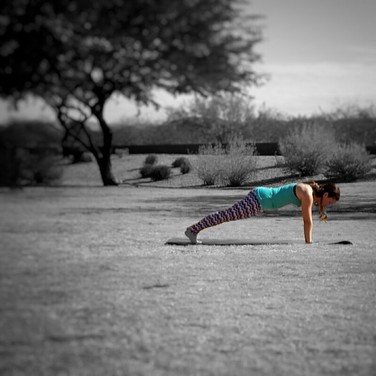
1. Begin in Plank Pose. 2. Bring your right hand directly under your nose. 3. Shift your weight to the outer edge of your right food and bring your left foot in front - scissor your legs. 4. Take your left hand high toward the sky. 5. As you move the right side of the body slightly forward, draw the left side of the body slightly back - stacking the hips and the shoulders. 6. Let your gaze follow and look up at the sky. 7. Stay here and come back to your six count breaths. Hold as long as you can. 8. Slowly come back to Plank Pose. You can take a break here, or repeat these directives for the opposite side. AGAIN!? Yes, again. Planks are one of the building blocks for handstands. Shoulder strength, ab strength, arm strength - all necessary to handstand safely and securely. If you cannot hold a plank for very long - handstands aren't for you. So...we drill. We practice planks over and over and over. We hold them longer and longer and longer. So today - we hold our high plank longer. We check our form. We breathe into our plank and find rest.
BONUS for those who read the blog - get an EXTRA entry into the prize drawing by mentioning the blog in your next photo post. ;)
Did you know that doing planks help to improve your mood? Virtually every exercise has the potential to give you a mood boost, and planks are no exception. Planks are unique, however, in that they help stretch and ultimately relax muscles groups that often become stiff and tense from prolonged sitting. The tension release that planks provide is uplifting for your spirit. There are two options for this one. You can do a pushup or a forearm plank. Both are beneficial!
TIPS: Keep your eyes focused out in front of you. Keep the body taut as you lower down. Really lift up your navel to prevent a sway in your lower back. If you need a gentler version - drop to your knees as you work through the entire exercise. Even on your knees you are working all the same muscles!
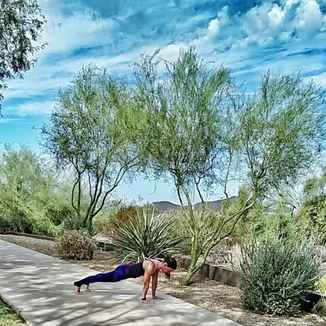
Day 1 - High PlankWait Haley, you said we were working on Handstands! No, I said we were working TOWARD handstands! Let's start with gaining strength. If you’ve never tried one, a plank may look easy, almost too easy to be beneficial, but this is deceiving. While getting into the proper form is straightforward, holding the position takes strength and endurance in your abs, back, and core. The plank is one of the best exercises for core conditioning and it also works your glutes and hamstrings, supports proper posture, and improves balance. Sounds perfect for handstands, doesn't it?
Visit Facebook and/or Instagram to get into the contest! Living Raw By Grace will give one lucky participant a FREE UnCookBook of their choosing at the end of the month!
I reviewed the Vitamix, Blendtec, Ninja and the Healthmaster in a previous blog post here, however that was over two years ago and needs to be updated! My experiences with each machine have evolved and I've used a new appliance, the NutriBullet, which I need to add to the mix! Vitamix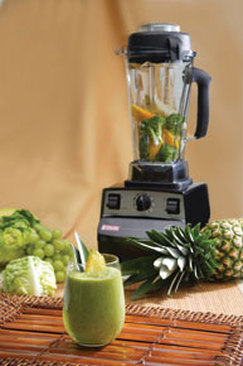 This is the cream of the crop - the ultimate blender that everyone should own. My use of my Vitamix (I've had both the 5000 and the 5200) over the past six years has cemented my unwavering loyalty to this brilliant machine. I bought my high powered blender the instant I decided the raw lifestyle was worth investing into. I've taken it on trips, on airplanes (checked & carry-on!), even on my honeymoon! Not only does it help me create all my raw vegan dishes, but it saves me tons of time. It grinds nuts and seeds, completely bursts the cell walls of plants to release that incredible chlorophyll, breaks down frozen fruit to make ice cream, in fact I haven’t found anything my Vitamix cannot do. When people ask if I miss hot foods (as I don't cook anything), I demonstrated how my Vitamix warms up my food. There is no heating element, but it runs at 240 mph and the friction heats up my soups, sauces, dips, etc. The only problem with the Vitamix? It’s expensive!!!!! If you buy a brand new Deluxe Vitamix 5200, with all the bells and whistles, it comes out to $650. HOWEVER! You can also buy a Vitamix that has been “factory reconditioned” for $329.00 (Click here!) ! I always recommend reconditioned machines. You get a brand new container with a motor that has been refurbished to be like new for half the price of the new ones. If you put in this code when you check out, you get free shipping ($25 savings!): 06-005351. People are always asking if there are other blenders out there that are cheaper, yet have the same performance. I have personally used four other blenders that are good in their own right, but I will stress that NO BLENDER have the same performance as the Vitamix, in my experiences. Now mind you, I use my Vitamix 3-8 times a day, and have used each of the following blenders at least a dozen times each while teaching classes and coaching people in their own homes. Blendtec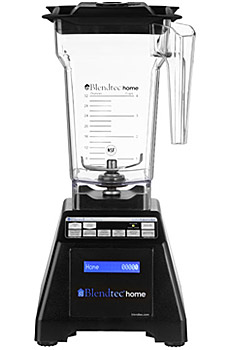 The first is a Blendtec, the rival to the Vitamix. It’s slightly more affordable than the Vitamix, coming in at $400 for the “Wild Side” (basic version), and only $279 at the moment for their Factory Reconditioned Basic. It’s slightly more powerful than the Vitamix, coming in at 1560 Watts vs. the Vitamix’s 1380 Watts. The Basic comes with a 32 oz. pitcher, the Wild Side has a 44 oz. pitcher, and the Vitamix has a 64 oz. pitcher. The Blendtec has a broader based pitcher – easier to get your food out and nothing gets trapped under the blades. The Blendtec can also warm up your liquids and dips, which is awesome for a raw foodist. All in all, the Blendtec is a GREAT BUY. If you find one, go for it. BUT…there are some major drawbacks. First, it does not come with a tamper – an instrument to push food into the blades. Therefore, you need to cut and dice your food smaller so it will move AND you CANNOT make Raw Vegan Banana Ice Cream in this blender. :/ That’s a big part of my diet, so I cannot imagine having the Blendtec permanently. Second, even though the base of the pitcher is larger (my Vitamix pitcher is tapered) and it makes getting your creations out easier, it has serious problems with both small amounts and large amounts of food. The blades will spin if there isn't enough food to move around - and while it's difficult to do small amounts in the Vitamix, the tamper makes it possible. Also you cannot fill it to the top with food and expect it to blend. I can make a full 64 ounces of Green Smoothie in my Vitamix, but you can only fill the 44 oz container half way! Third, the larger motor doesn’t do any more than I need, but it is a LOT louder – which is not so good when you have kids with sensitive hearing, babies, or need to do any food prep when people are sleeping. And fourth, with all its preprogrammed settings (ice cream, dips, smoothies, etc.), it's much harder to work manually. When trying to make a dip out of cashews, for example, you need to run the dip setting two to four times to get the same consistency with the Vitamix. In my opinion the next blender is more efficient than the Blendtec, for a fraction of the price. NutriBullet The NutriBullet is new on the market in the past year, which makes me both excited and nervous. Excited because it holds such promise and is such a great deal. Nervous because it is part of the Bullet family of machines and they all had mechanical issues...so I'm hoping those have been improved upon or fixed. The Magic Bullet had issues with leaking, with breaking down quickly (buy a new one every year or two), and so I'm been playing with as many as I can do see how they fare. So far, none of those issues have arisen (please comment at the bottom if you'd had any issues with yours!). It's not a bad price of $130 on their website (you can also pay in installments!), but I've found it as little as $87 on Amazon. The Nutribullet has only 600 watts, which is half the power of the Blendtec and Vitamix. And the pitcher to blend in is only 24 ounces large. However, it is GREAT for small quantities of smoothies, dips, and dressings. I would not use the NutriBullet for soups, ice cream, or large quantities of anything. It does grind grains and nuts, though, and for that reason alone I prefer the NutriBullet to the Blendtec. I find I get a better consistency from grinding nuts and then adding the rest of the ingredients in the NutriBullet than the Blendtec. There has been a handful of times that I've switched from the Blendtec to the NutriBullet when my clients had both machines. That being said, you get what you pay for. It's a good price, but still cannot create the amazing dishes that the Vitamix can. However, if I have the option to use the Blendtec or the NutriBullet....I'll be choosing the NutriBullet. FYI, the whole extracting vs. blending vs. juicing thing? The NutriBullet is a blender, no matter how they spin in. HealthMaster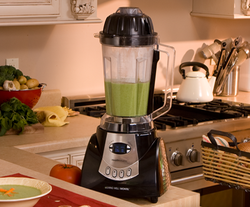 I have had the opportunity to try out Montel William’s HealthMaster on several occasions. You can find it on Amazon for only $120 (it keeps getting cheaper every year!). It comes in at 1100 watts of power, which isn’t much less than Vitamix’s 1380 watts. It has a monster 70 oz. pitcher that has a nice broad base where no food gets stuck. It comes with a tamper! Yaaay! Raw Vegan Ice cream, here we come! AND…the base is programmable just like the Blendtec. Here come the con’s. First, like the Blendtec, even though the base of the pitcher is larger (my Vitamix pitcher is tapered), I have problems doing small amounts of food. One cup of dip in the HealthMaster just spins…doesn’t mix, even with the tamper. Second, the lower wattage means that it just isn’t as powerful and doesn’t blend as smooth or creamy as the Vitamix or the Blendtec. I tried to make a pie crust (crushed nuts and fruit) in the HealthMaster and it got stuck in the pitcher, and I had to take it all out and use another appliance. The pitcher has pockets where food gets caught and I can’t just spatula it down to the bottom…I’m not sure if you can see from the picture. The motor is ridiculously loud and slightly smelly (which the manufacturer says will wear off within six months). Lastly, it has two locking mechanisms that sound like a wonderful safeguard but are actually quite annoying. The thing won’t run unless the pitcher is locked to the base and the lid is locked to the pitcher. Both locks are quite difficult to engage and after working with it for a half an hour, my fingers were starting to blister. I got used to it quickly, but my friend said she was less likely to work with it because of this feature. It also doesn't run at the speeds of the Vitamix or Blendtec, which means it won't warm up your food. I have had too many people tell me that their Health Master broke down within the first year to recommend this machine any longer. Use your money more wisely! Ninja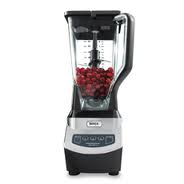 Lastly, I've had more experience with the Ninja than with the previous two machines because it's far more affordable, available, and everyone seems to be getting one! This machine is wonderfully unique in that it has multiple blades. Because of this, a tamper is less necessary to push food into the blades - there are blades in the middle and on top! It has a programmable base with 1000 watts of power (only 100 less than the HealthMaster!), has a wonderfully easy to use 72 ounce container. All in all, they have taken a little bit of everything and made a great machine for only $100. However, you get what you pay for. With the Ninja, you pay a fraction of the price for a fraction of the ability. I cannot make the same quality of dips, sauces, desserts, smoothies, and ice cream is out of the picture. It does many amazing things and is far better for making Green Smoothies than a traditional blender (Oster or Hamilton Beach). So if you are using your blender for mostly just smoothies - than this is a great machine for the price! The Ninja and the NutriBullet are close in my mind, but this would be great for large amounts of liquids and the NutriBullet would be great for small amount. If you live by yourself, go with the NutriBullet. If you live with a large family, this is the machine for you. If you have the budget and would like to make the investment - the Vitamix is the best there is and you'll have it for a decade or more without needing anything else! Each of the machines listed come with recipe books that are definitely a part of the price - wonderful recipes that get you to use the machine and eat healthier. Sure, they aren't raw vegan, but they are homemade from scratch and encourage you to move away from processed foods. That's the first step - less processed, more whole foods!
So there we are. Five different blenders. Each of the blenders tackled Green Smoothies with ease and are amazing blenders. The Ninja and the NutriBullet are close in my mind, but this would be great for large amounts of liquids and the NutriBullet would be great for small amount. If you live by yourself, go with the NutriBullet. If you live with a large family, this is the machine for you. I still recommend the Vitamix. It is worth the investment and even if you aren’t raw in any capacity it is wonderful for your kitchen. Not to mention, the Vitamix has been around since 1937 and is made in the US. If a machine has a warranty, I would trust a company that has been around more then ten years and has perfected the craft that they are in. Just my two cents... If I have moved you toward the Vitamix and are interested in purchasing one, use this code for free shipping (06-005351) and go here! I hope this helped!!!! 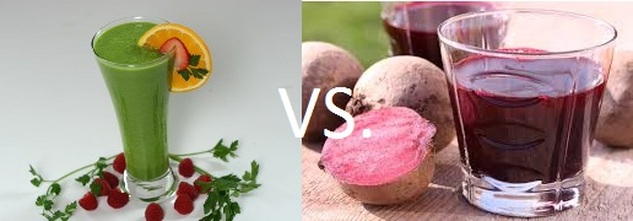 Smoothies VS. Juices What's the difference? Smoothies are used with a blender. You blend fruits and/or vegetables with water to get a smoothie. Juices are used with a juicer - an appliance that separates the juice from the pulp of fruits and vegetables. My experiences have led me to be a Blender/Smoothie Girl, although I do make juice now and then. I'll explain why I am, but first let's take a look at the Pros and Cons of both methods. 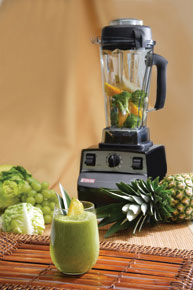 BLENDING PROS Fast: You place chopped fruits/vegetables and water into your blender and let it run for a few minutes. Then, you rinse your blender and you are done! Simple: Since you are using the whole fruit/vegetable, you can only fit so much into your blender. When it is full - you are ready to blend! And there is usually only one component to clean with a blender, the canister that holds the smoothie. Inexpensive: If you blend one apple with water, you can get up to 8 ounces of smoothie. The cost of that apple is minimal and the water is usually free = inexpensive drink/meal. Fruity: You can enjoy tons of fruit in your smoothies, since the soluble fiber slows the absorption of sugar into your bloodstream into an even increase of energy. Longevity: Since you blended the whole food, the fiber helps to protect the fragile nutrients, which means that it can last longer without losing nutrition. I usually recommend that you drink your smoothie in 36 hours of less, if it stays refrigerated. Convenient: Making a smoothie full of fruits/vegetables is far faster than sitting down and chewing the same amount of produce. Easier To Digest: Solid food needs to be broken down. Even if you chew your food remarkably well (and most of us do not), you still may not break down the fiber or cellulose of the green leafy vegetables as well as a blender does. Blending does the work that our jaws should do and the nutrition is available immediately. You receive more nutrition to absorb and your digestive system has far less to do. Instead of breaking down large chunks of food, it simply is absorbed, assimilated, and passes through. It's Great For Children: A blended smoothie that tastes like fruit but has hidden leafy greens gets more nutrition into your children that may not have eaten a salad with spinach. Satiety: All that fiber and juice combined in your belly keeps you full longer. While it slows down digestion slightly, it helps the hungry feeling stay away. BLENDING CONS Blender Quality: makes a difference. In order to have a smooth texture, a high speed blender will do the best job. The Vitamix is my personal favorite (See the bottom of this post for the best deal!) and is the best machine I've used so far (I've already written a blog about it here: http://www.livingrawbygrace.com/1/post/2012/07/vitamix-vsblendtec-vs-healthmaster-vs-ninja.html) Drink Slowly: If you drink it too fast, it will sit and ferment in your belly/gut, causing gas and bloating. Take your time, chew while you drink, Texture: Some people find that the texture of smoothies is difficult to palate - too thick or pulpy. I usually tell people that they need to add more water if this is an issue, but I hear it every now and then.  JUICING PROS Even Easier to Digest: Due to the lack of fiber in the juice - there is little to nothing to digest and your body can utilize the nutrients even easier. Even More Nutrition: You get very large amounts of vitamins and minerals, due to the amount of produce that goes into the juice. You would not be able to eat this much produce in anywhere near the same amount of time. Convenient: This is a great way to get the most amount of nutrition into your body without having to eat all the food all day long. It's difficult to put away several pound of green leafy vegetables in one sitting, but very easy to drink them and get the same nutrition. Healing: Due to the high amount of vitamins and minerals - you are able to get nutrition where your body needs it most. Green Cabbage juice has been shown in studies to heal stomach ulcers on contact! JUICING CONS Expensive: Due to the amount of produce needed to create juice, you can spend a lot of money on one glass of juice. Quality Juicers are also expensive as well. Time Consuming: Each piece of produce needs to be fed through the juicer separately, which takes time. Cleanup is also a lengthy procedure, as there are multiple pieces of the juicer to take apart and clean. Cleanup needs to happen immediately or the juicer will begin to degrade over time. Spike in Blood Sugar: The soluble fiber of fruits and vegetables slows the absorption of sugar into your blood stream. Juicing, unlike blending, removes that fiber so when you drink a juice that is high in fruit - your blood sugar will spike and then crash. When juicing for yourself, make your juices vegetable heavy, with small amounts of fruit. Your body will thank you later. Short Shelf Life: The soluble fiber in your food also helps protect from oxidation and degradation. When you juice fruits and vegetables, you need to drink that juice almost immediately. The more expensive the juicer, the better it preserves nutrition. There are a few juicers out there (usually commercial grade) that preserve the nutrition so the nutrition is still available 2-3 days later. That being said, always try to drink your juice as soon as possible - you'll simply get more nutrition. Wasteful: All that pulp that was extracted? Yeah, most people just throw that away. There is good nutrition in there, but after you juice...there is no purpose for it. Now there are recipes out there that you can use the pulp in...but that's a lot more work Soooooo....should you juice or should you blend? I say, both! I juice on occasion and blend nearly every day. I will always be a blender girl simply because it's faster, cheaper, easier, and sweeter. I definitely have a sweet tooth! That being said, I absolutely adore a fresh juice now and then. My husband prefers the taste and consistency of juices so he consumes more, and he also needs less sweet than I do. 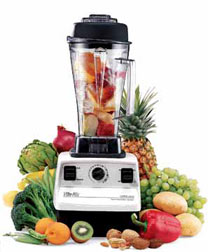 Now, if you are looking to begin blending, I recommend the Vitamix. It simply is an amazing machine for the money. I always recommend reconditioned machines. You get a brand new container with a motor that has been refurbished to be like new for half the price of the new ones. You can get a 64 oz container & base for $329. If you put in this code when you check out, you get free shipping ($25 savings!): 06-005351. https://secure.vitamix.com/Certified-Reconditioned-Standard.aspx As for juicers, I love my slow masticating juicer. It takes a little longer, but you get a better juice than centrifugal juicers and you get less waste - I love not throwing away a ton of pulp. I started with a Breville, but have since moved onto a Hurom. Love it! Here's a blog I wrote about my adventures in juicing: http://www.livingrawbygrace.com/1/post/2013/06/my-juicing-adventures.html While I juice now and then, I'd much rather just buy some fresh, cold pressed, raw juice. I found an amazing local company does all the work, buys all the ORGANIC produce, uses an amazing juicer that preserves the nutrition for several days, AND figures out how to make it delicious every time. Sounds like a steal! Local Organica - AND they deliver! :) http://www.localorganica.com/ 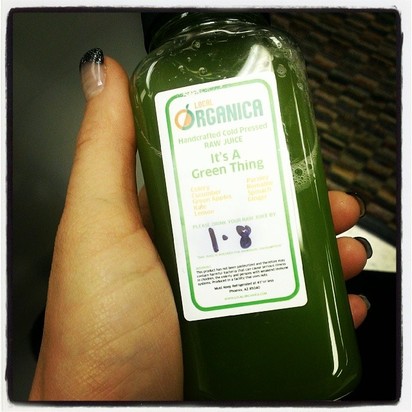
|

About the BloggerHaley is passionate about Raw Food and how God has used it to heal her. She loves to share what she knows with anyone who is curious, and finds herself talking to everyone around her about her lifestyle. Archives
January 2020
Categories
All
|


 RSS Feed